Connect your systems with the API and webhooks
7 steps7 min read
For developers connecting a store, ERP or WMS. You need the owner, or a team member with the Developers permission, to create the key, and a public HTTPS address to receive webhooks.
In this guide
Step 1: Create an API key
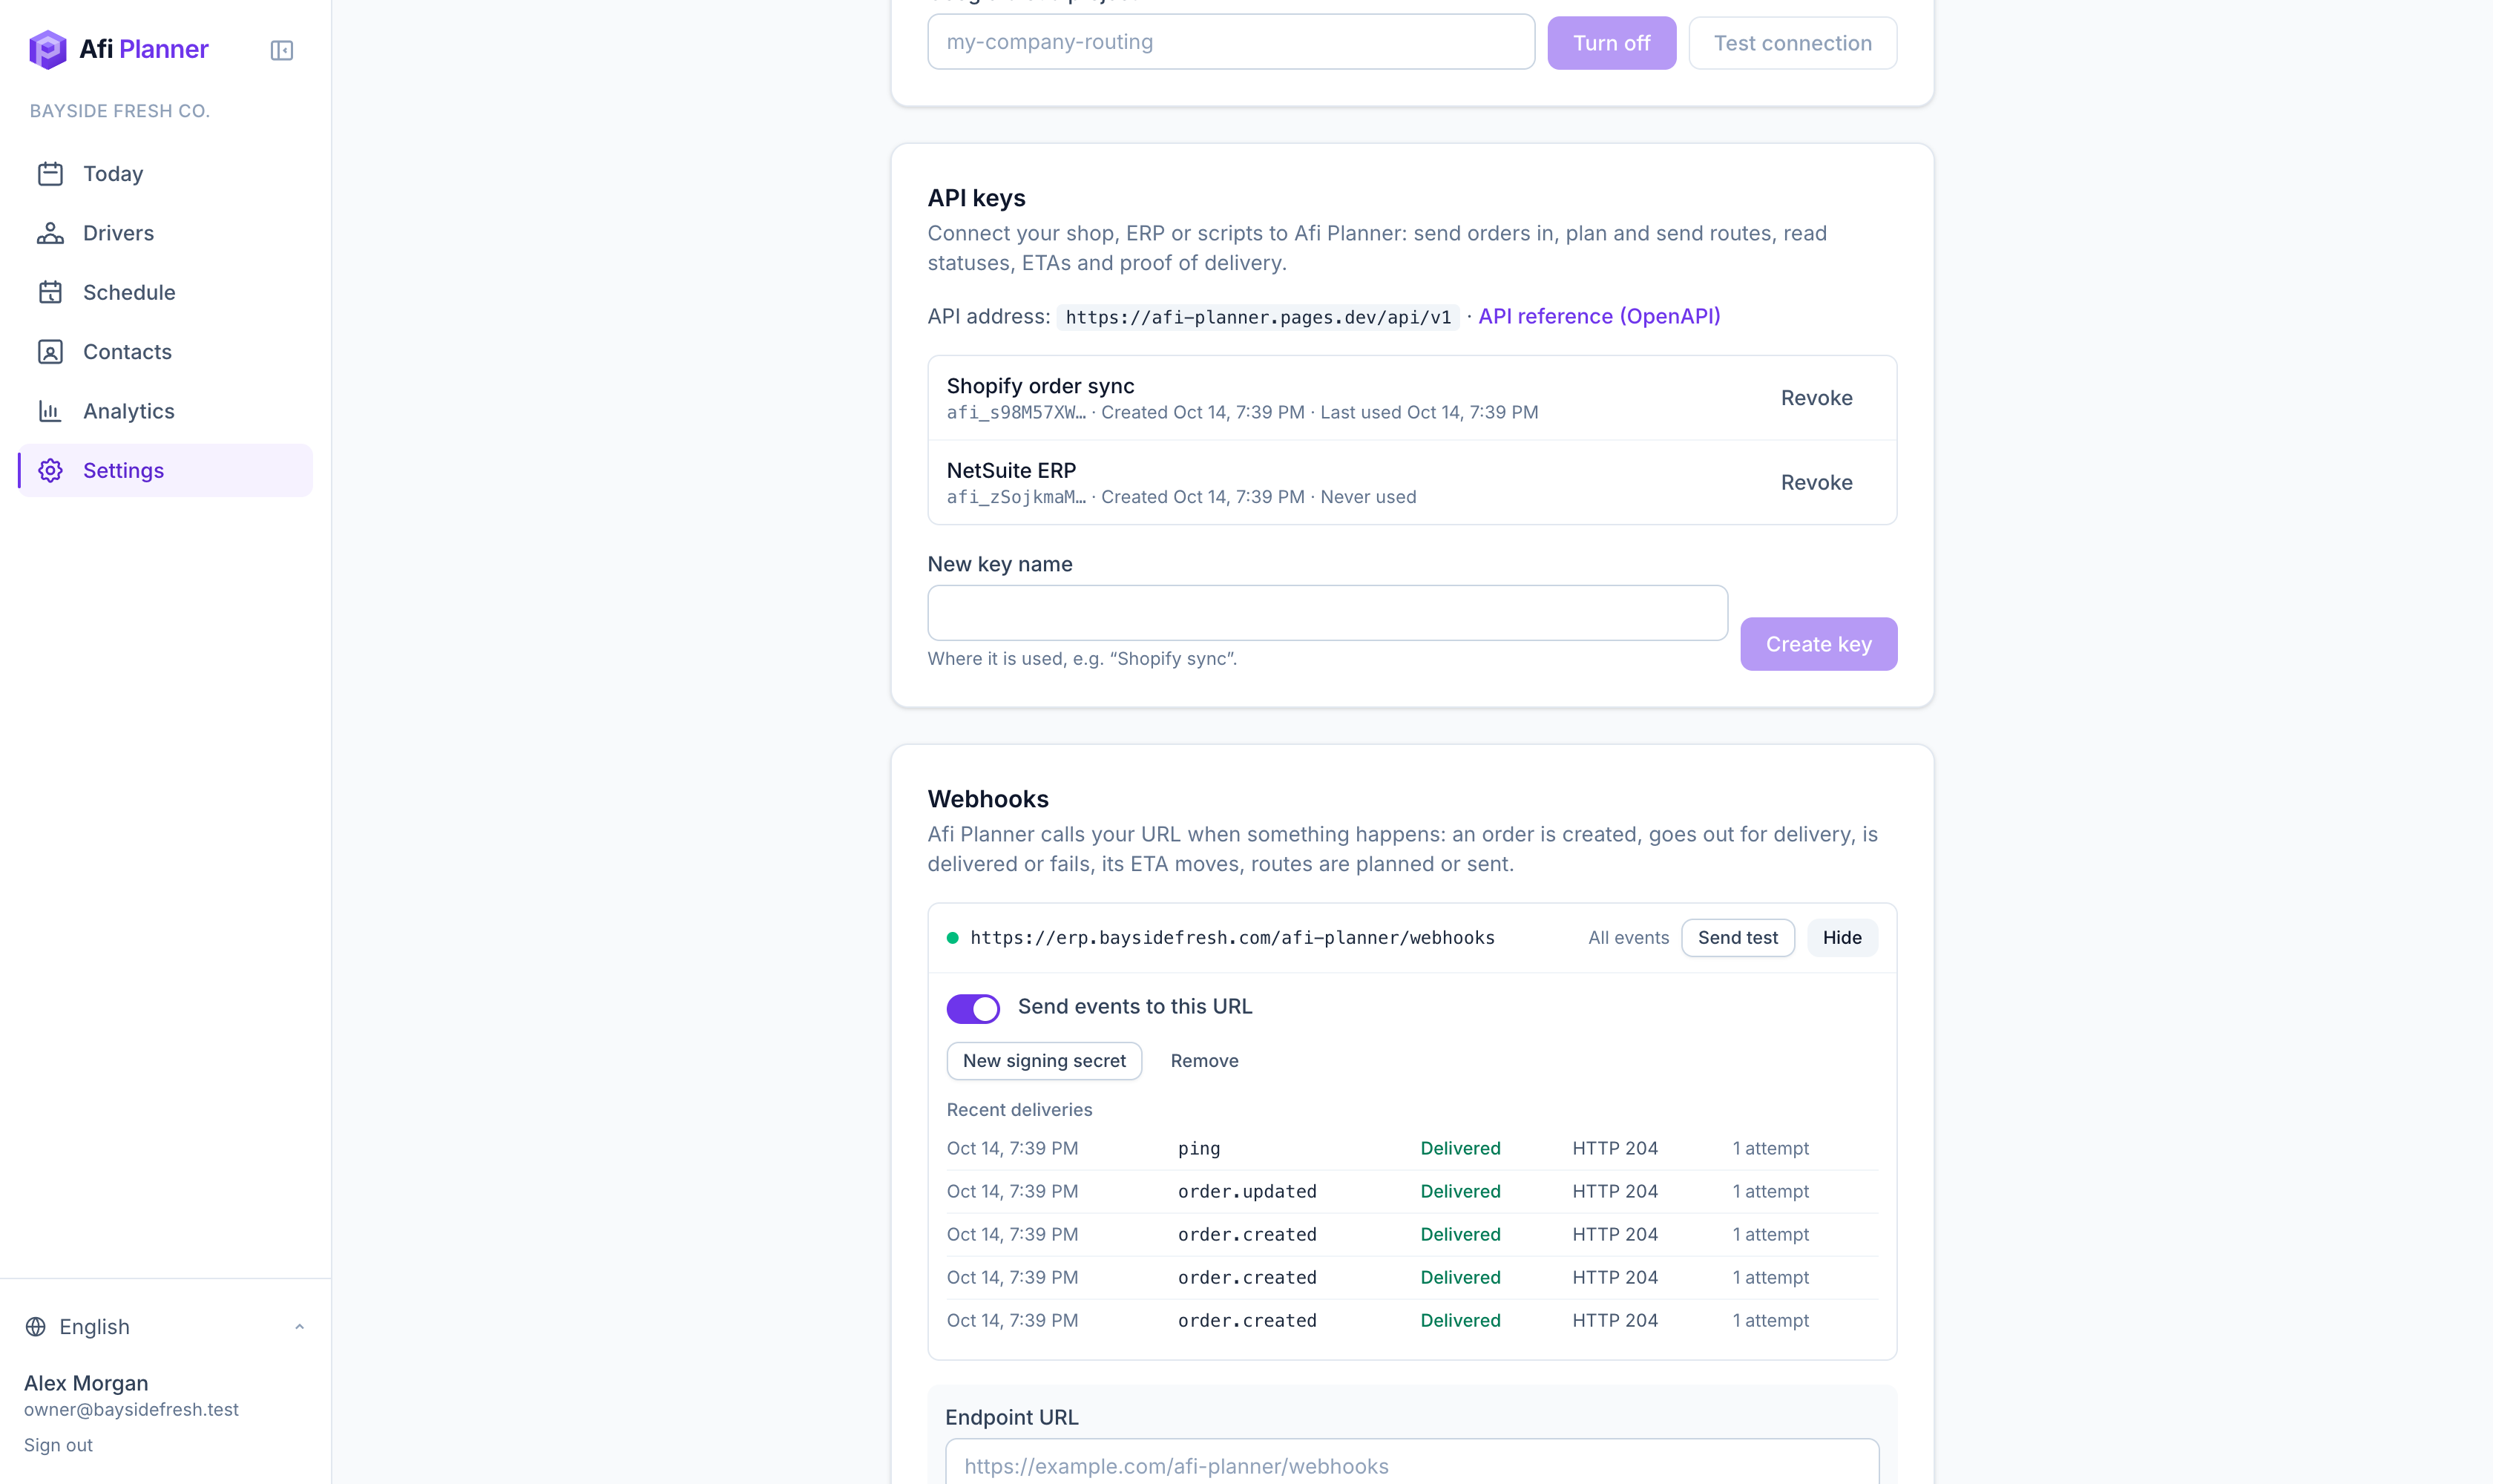
In Settings → Developers, give the key a name (where it is used) and click Create key. Copy it right away: it is shown only once. Send it with every request as Authorization: Bearer <key>.
Step 2: Try it before you code
Click Test this key and send a ready-made request (check the key, today’s orders, create a test order and read it back) or your own. You see the answer, the status and the timing, with a curl command to copy. Download the Postman collection made for your company and open the API request log to see every call of the last 3 days.
Tip: Give test orders an order ID starting with API-TEST-: they are never planned or messaged, don’t count anywhere, and are deleted after 3 days.
Step 3: Read the reference
The API lives at your Afi Planner address under /api/v1. Its full description is at /api/v1/openapi.json (OpenAPI 3.1), which most tools can import to generate a client.
Step 4: Send orders
POST /api/v1/orders with your order ID as ref, the delivery day, the address (or latitude and longitude), time windows, packages and weight. A ref names one open order across all days: sending it again updates that order and keeps its day (a ref whose order failed in the last 14 days becomes its next attempt, same tracking link), until a driver has worked on it: then the answer is 409 order_worked with the order’s id, and PATCH /api/v1/orders/{id} changes its fields. Use /api/v1/orders/batch for up to 1,000 orders at once; a day’s plan still holds at most your package’s stops per plan (500 on the free trial), and a batch with more new orders than fit is refused whole.
Tip: Add an Idempotency-Key header to POST requests: if a request is retried after a network error, you get the first answer back instead of a second action.
Step 5: Plan and dispatch
Choose the day’s drivers with PUT /api/v1/days/{day}/drivers, start planning with POST /api/v1/days/{day}/optimize, follow the job with GET /api/v1/jobs/{id}, then send the routes with POST /api/v1/days/{day}/dispatch. Your dispatchers can still adjust the routes in the app. Reads always give the routes as sent to the drivers, the same your customers see; while the dispatcher’s board differs from what was sent, orders also carry draftRoute and the day’s plan carries draft. If a dispatcher splits a day into several plans in the app, new orders and these day endpoints use the day’s first plan.
Step 6: Add a webhook
In Settings → Developers, add your HTTPS endpoint and choose the events. Copy the signing secret, then click Send test: the result and every later delivery show in the log, with the payload, the headers and your server’s answer, and a Resend button.
Step 7: Verify each event
Each request carries Afi-Signature: t=<time>,v1=<signature>. Compute HMAC-SHA256 of “t.body” with your secret, compare it with v1, and reject events older than five minutes. Answer with a 2xx status within 10 seconds and do the work afterwards; failed deliveries are retried for about a day. Events raised while an endpoint is off are not kept for it: after turning it back on, read the orders with GET /api/v1/orders?day=.
Developers
API integration guide: every step with curl examples →
Related feature
Connect your systems in both directions →